Ever considered hosting a crochet blog hop to highlight the work of your designer friends, gain some valuable exposure, and make money?! Well, in this post, I’ll walk you through ten valuable tips for hosting a blog hop that does just that!
Well, I did it. After three years as a crochet blogger, I finally jumped into the deep end and hosted my first-ever, 30-day crochet blog hop (thanks to some encouragement and advice from my friend, Claire, at E’Claire Makery).
I have to admit, I might be hooked.
While a blog hop is a lot of work, it is a great opportunity to expand your base readership, collaborate with other designers, and increase profits, all in one, organized event.
Want to read all about how I did with my last blog hop? Click here to read my Blog Hop Income and Traffic Report.
Wait, you don’t know what a blog hop is? OK, let’s go over that first.
What is a blog hop?
A blog hop is an organized event in which several bloggers (in the case of a crochet blog hop, several designers) come together, hosted by one or more event hosts, in order to increase exposure through shared readership.
Basically, the participants are all agreeing to promote the event in order to encourage their followers to begin following the others.
There are different forms of blog hops that you might see on the internet:
- Open Blog Hops (aka link parties) – these are open events where anyone can add their link to the link up provided they fit the criteria of the event.
- Closed Blog Hops – in which participants register or are invited ahead of time. The number of participants is usually limited in a closed hop.
- One-time Blog Tour – each participant goes ‘live’ with thier blog hop post at the same time while including links to the other participants in a list form or linking to the ‘next’ participant in a loop fashion (where each blogger links to the next, links to the next, etc.).
- Mega Event Blog Tour – posts are dripped out over a set time period (typically, one week or one month) with the host acting as the blog hop hub. Participants all share links to the blog hop hub which, then, directs readers to each of the blogs.
In the crochet blogging world, blog hops are typically organized as closed, mega event blog tours and are formatted based on the preference of the blog host. As I share my tips, below, they will be based on the closed, mega event blog tour framework.
Basically, I offered one or more free PDF downloads of a new or existing design each day for 30 days. I updated my blog hop hub post with the new design information and links, daily.
The format of typical crochet blog hops might include one or more of the following;
- a free, blog-based pattern shared daily,
- a discounted premium pattern shared daily,
- a brand new, never-seen before design,
- an existing design that is now available for free or at a discount during the event,
- a free, limited time (usually 24 hours), PDF download shared daily,
- a bundle sale,
- a giveaway, or
- anything else the host can think of.
Pretty much, the sky is the limit when it comes to getting creative with your blog hop. Ultimately, you want to consider how you will drive traffic to your blog and the blogs of those who are participating and how you will monetize the blog hop for yourself (and the others).
I’ve read some bloggers say that the point of a blog hop is pageviews but, in my view, the point of a blog hop is revenue. If you focus on pageviews without thought to how you will monetize, it feels more like ‘for fun’ than ‘for business.’
So, let’s take a look at some tips for hosting a blog hop that brings both exposure, pageviews, and revenue. In other words, let’s see how a crochet blog hop can grow your business, shall we?
10 TIPS FOR HOSTING A PROFITABLE CROCHET BLOG HOP
1. Be Organized
OK, this is key. For some of us creative-types, organization isn’t our prime forte, but it is a necessity if you want to host a successful blog hop.
One of the ways I stay organized is to keep everything all of my documentation in a single Google folder. That way, I can always find what I’m needing and all participants can share documents in that folder, as well.
If you’ve never used Google Drive to share documents before, this article can help you learn the ropes: https://support.google.com/docs/answer/2494822?co=GENIE.Platform%3DDesktop&hl=en&oco=1
This is how my blog hop folder is organized:
- TOP LEVEL FOLDER with BLOG HOP TITLE
- Signup Spreadsheet with all the details participants need
- Graphics Folder
- Blog Hop General Graphics
- Social Media Graphics
- Individual Design Graphics
- Videos
- Swipe Files
- Emails
- Blog Post
- Designer Files (participants add photos and PDF patterns, if required)
We’ll go over some of these items more in the “Give Participants the Tools for Success” section, below.
2. Choose a Theme
If you’ve been following Crochetpreneur® for any length of time, you know that I love a good niche. Well, it’s no different for when you’re planning your blog hop.
Choosing a theme is like choosing a niche and it will help you attract your ideal readers/customers to your event and this serves as a great way to collaborate with designers in your niche as well.
The more narrow your theme, the more segmented or specific your blog hop readers will be. And that’s always a good thing.
Some examples of themed blog hops are:
30 Days of Cozy hosted by Made with a Twist
Fall Fashion Blog Hop hosted by E’Claire Makery
Cancer Crochet Challenge hosted by Sweet Potato 3
The Perfectly Picot Bog Hop hosted by Stitch and Hustle
Whatever your theme, let your participants know the #hashtag and promo code you’ll be using for the event.
3. Vet Your Designers
For any blog hop, you’re going to want to determine your participating designers well in advance so they have time to create their designs, get them tested, and create their blog posts.
If you’re hoping to plan your blog hop quickly, you might be tempted to open your event up to anyone and everyone who wants to join. But, there are some things you’ll want to keep in mind:
- Not all designs are created equal. Be sure your participating designers are willing to invest the time and effort to create a design that will be well-received. In order to do this, you might want to use an application process so you can select designers that fit your vision for the event.
- Know that someone will flake on you. Whether she’s overbooked, overwhelmed, or just not invested in the project, it’s highly likely that one or more designers will not follow through on their commitment. Have a backup plan (I always have one to two designs waiting in the wings in case I need to add a post quickly)…and a dead-to-me list.
I’m only half serious about the dead-to-me list – if someone flakes and ghosts me, they end up on the dead-to-me list but if they have a valid reason for being unable to meet a deadline, of course, I choose grace.
- Designers with a larger following will draw more readers. It’s just a fact. Now, the purpose of my blog hop, 30 Days of Cozy, is to share both new and veteran designers from the Crochetpreneur® Business Academy with the world. So, numbers don’t really matter to me. But, if your goal is to increase exposure, it would be wise to include some designers with a larger following.
4. Don’t Overcommunicate
When it comes to blog hops, the simpler the better.
Keep communication and rules simple. The more complicated you make things, the more likely your participants will become overwhelmed and miss something.
These are emails I suggest sending to your participants:
- Welcome email: sent about two months before the blog hop and includes instructions, rules, deadlines, and links to the shared Google folder and signup spreadsheet.
- Reminder email: sent about one week prior to your deadline for submissions and should include, again, the link to the Google spreadsheet and folder with all graphics and swipe files not ready to use.
- Missed Deadline email: whoops…this is a reminder email to those who missed the deadline. I suggest giving a 24-hour notice. If you don’t hear back, replace that participant with a backup or with your own design so you don’t get stuck with a no-design day.
- Pre-hop email: this is sent a day or two before the blog hop and includes a link to the blog hop hub post on your blog.
- Post-hop email: be sure to thank your participants for a great event and invite them to participate again next year.
Additionally, I like to send a Facebook message to each designer the day before their feature-day, just to be sure everything is working properly.
5. Give Participants the Tools for Success
This is where the magic happens. When your blog hop participants have the tools they need for success, they’re going to much more likely to follow through with promotion of not only their own design but all of the designs in the event.
So, what tools am I talking about?
Graphics
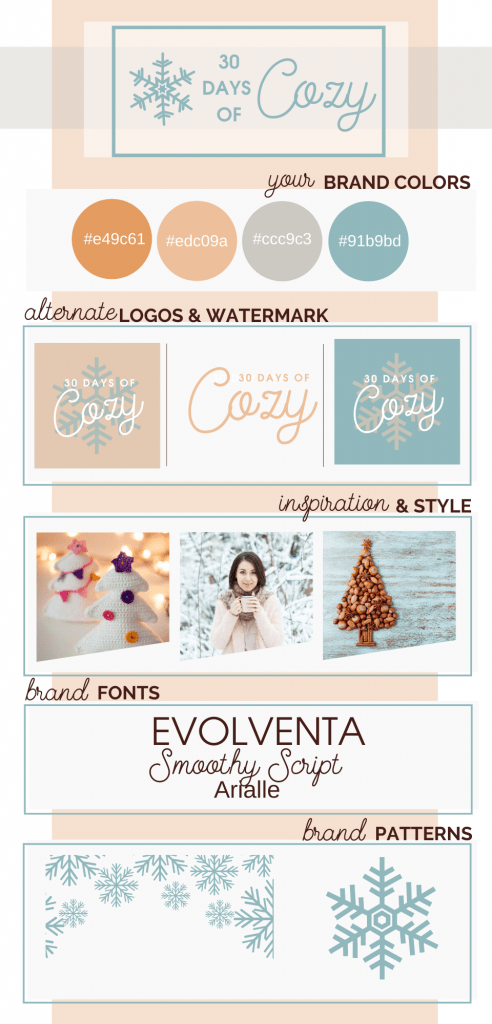
Event brand board: create a branding board for your event so participants can create their own graphics, if they’d like, and you’ll know that everything is cohesive.
Using Canva, this is the brand board I created for 30 Days of Cozy.
Badge: a blog hop badge is a simple graphic that all of the designers can use on their blogs to promot and link to the blog hop hub on your site. If you want to get really fancy, you can create two designs, one to be used as a sidebar link and one leaderboard to be used in-post.
Here are the blog hop badges I created for 30 Days of Cozy.


Pattern Download Button: This is the button that readers will search for, on each designer’s blog, in order to download their pattern. Having a branded button just makes things easier for everyone.
Here is an example of the button we used for 30 Days of Cozy.

Now, of course, you’ll use whatever text is appropriate for your blog hop format.
Social Media Graphics: You can create a simple template for your social media graphics in Canva and either share that template with your participants or create graphics for each design being shared and uploading that to your Google folder for participants to use.
I stick to creating social media graphics for Facebook and Instagram stories. I use a simple square image for Instagram. Here are examples:


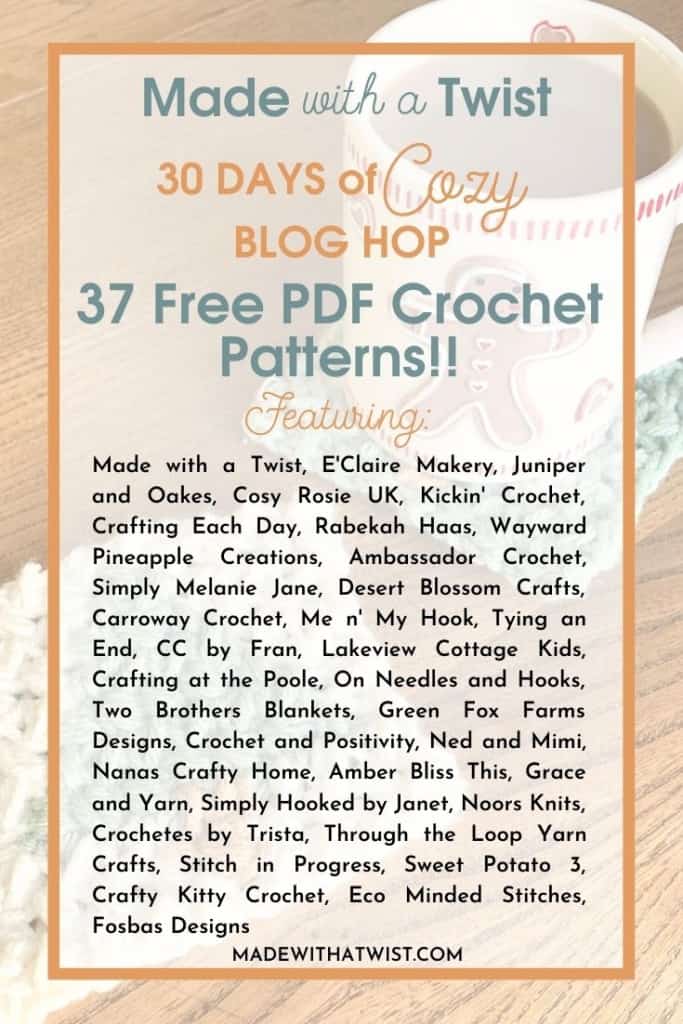
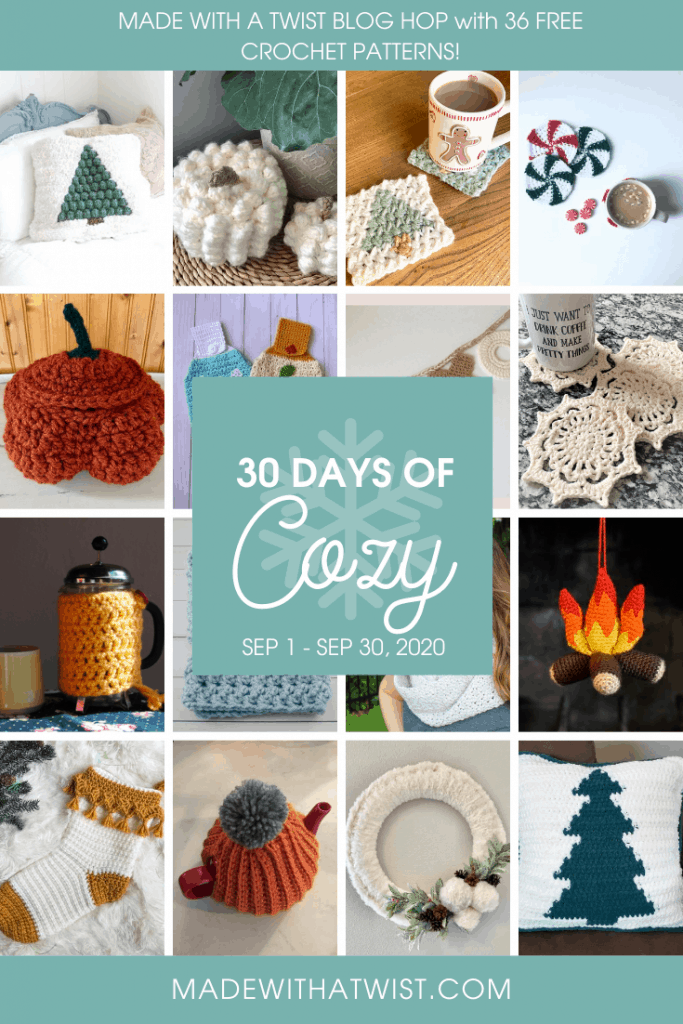
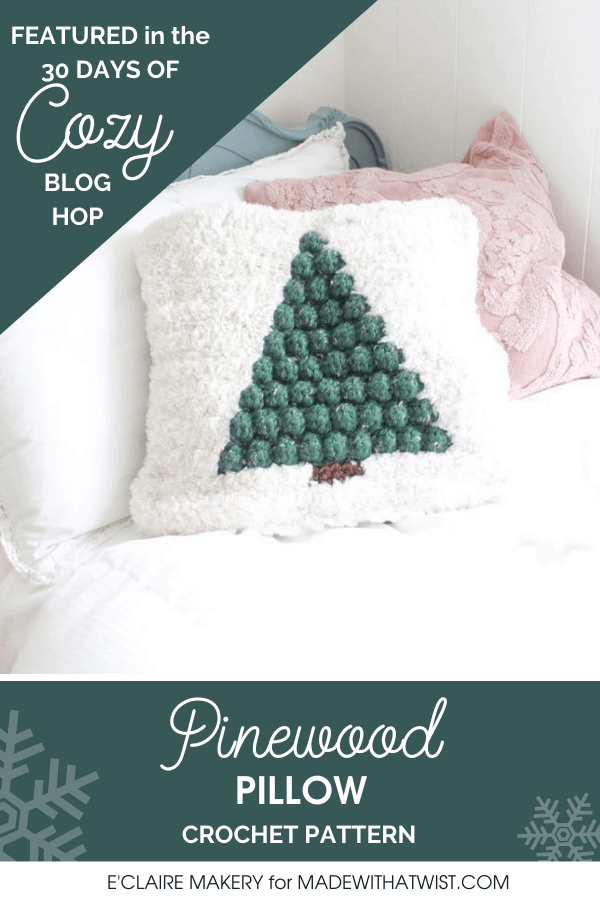
Pinterest Graphics: As always, Pinterest is going to be a great generator of traffic for your blog. Creating Pinterest graphics that your participants can share makes it easier for everyone to get involved in the process.
I created one text-based graphic and one collage-based graphic for the blog hop along with graphics for each individual design shared and linked all of those back to the main blog hop hub.
Here are examples of those:
Videos: Videos are everything right now. Whether you’re using them for social media or as an avenue to generate advertising revenue, I recommend creating at least one video for your blog hop.
Here is an example of a social media video I made, using Canva, for the 30 Days of Cozy.
I used Lumen 5 to create this video but Canva is helpful for this as well.
Swipe Files
Prewritten copy that your crochet blog hop participants can use for their various promotional activities is called a swipe file.
While swipe files are not a requirement, they are really helpful and will make life infinitely easier for the designers participating in the blog hop that you host.
The different types of swipe files that you might include are:
- Email Swipe Files
- Introducing the blog hop
- For the day that this particular designer is featured
- A weekly email to highlight upcoming designs
- Blog Post Swipe Files – this is an blog post that participants can use to introduce the blog hop, sell the bundle (if offered), capture giveaway entries (if offered), and direct readers to the blog hop hub on your site.
- Social Media Post Swipe Files – used to introduce the blog hop on various social media platforms
- Bundle Sale Swipe Files (optional – more about this, below)
- Sales copy for social media
- Sales copy for blog post
- Email sales copy
- Introduction to the bundle sale
- Bundle sale ending email
- Last chance to the get the bundle
Other
Promo Code: The promo code is the code that will be used to download the PDF for free on Ravelry (recommended site for directing downloads). By using a branded promo code, you make it simpler for readers to get into a rhythm, day by day, when downloading patterns and this helps to eliminate confusion (Thanks, Claire for that tip!).
You can have your designers direct their readers to the blog hop hub to procure the promo code or have the designers offer the promo code on their own blogs, it’s up to you.
If you only share the promo code on the blog hop hub, that means more pageviews for the host and, likely, for the participating designer. However, having the code on the designer’s site makes it easier for the reader and eliminates the need to bounce around. So, that’s up to you.
Hashtag: When you use a branded hashtag, it makes it easier for participants to share content and promote the blog hop. They can simply search for the hashtag and reshare posts AND when readers use the hashtag when sharing their makes on social media, it makes it easier for you to go give them all the love. Keep your hashtag simple and related to the blog hop title. I use #30daysofcozy.
After learning about all these helpful tools you can use to assist your blog hop participants, you might be thinking, “How am I ever going to get all of that done?”
Well…this is where tip #6 comes in…
6. Line Up Some Help
That’s right. This might be your first opportunity to actually hire someone to take on these tasks that might take up so much of your time that you decide not to do them. 🙋♀️< #guilty
Let me assure you, whether you want to enlist your talented teenage daughter, local stay-at-home mom-friend, or a professional VA, you are going to be so grateful for the help.
I already have a VA on staff, so I just asked Lauren to create all the graphics for me. She did that and uploaded them to the Google drive.
She also scheduled out all of my Pinterest posts for the event. So, that saved me a BUNCH of time.
If you don’t have someone on staff, reach out to your fellow bloggers, find a VA on upwork, or ask around in your neighborhood for someone who already knows how to use Canva and Pinterest.
If you can find someone who enjoys copywriting, you can have them take care of your swipe files, too!
In the end, this kind of help is well worth the price you might pay and, often, can be handled for minimum wage or you might barter some of your beautiful makes in exchange for the help.
7. Offer a Reduced Price Bundle
OK, this does make things more complicated.
If you’re a first-time blog hop host, you might want to skip this step and get some experience under your belt. But, if you’re a risk-taker and an over-achiever, go ahead, dive in head first.
Basically, a bundle is a collection of all of the PDFs that are being offered for free in your blog hop (should you have it formatted that way), curated into a single collection and offered at a steep discount.
The benefits of a bundle for your readers are that they…
- don’t have to return to the hop each day to get offered design,
- can catch up on any of the patterns that they missed during the limited time download period (typically 24 hours for each design), and
- get to have all of the patterns way before they’re offered to anyone else.
The benefits of a bundle for you and your participants are that you…
- will be able to monetize the heck out of your blog hop.
Some extra steps that you’ll need to take care of when you add a bundle to your self-hosted blog hop are:
- you’ll need a place from which to host and sell the bundle – I use (this is an affiliate link) SendOwl,
- you’ll need to set up a sales page (my sales page for 30 Days of Cozy),
- you’ll need to create graphics and sales copy for the bundle sale,
- you’ll need to set up your participants as affiliates (you can do this in SendOwl) and determine the affliate percentage (I offered 70% commissions) and payout schedule (I pay out commissions 30 days after the end of the sale to account for my money-back guarantee), and
- you’ll need to address customer issues…there are always customer issues.
Even with the extra work, I’ve always found that the proceeds from a bundle sale make that extra work worth it.
8. Upsell
One of the benefits of offering an item for sale is the opportunity to add an upsell. An upsell is kind of like saying, “Would you like fries with that?” as your customers check out.
For 30 Days of Cozy, I used the simple upsell capabilities of SendOwl to offer bundle purchasers the option to include a Crochet Project Planner upon checkout – and many of them took me up on it.
And the best part, for you, is that you can offer this item for a lower affiliate commission rate (mine is 30%) and, for your participants, that they get to make more money without any extra work.
Win…win…win. Everybody wins!
And, speaking of winning, another way to create excitement and help your participants collect email signups and cookies (if you’re doing a bundle sale) is to…
9. Host a Giveaway
Now, if you know me, you know I love a good giveaway! And, when you use a Rafflecopter form, the giveaway will give you something back by providing a way to collect email addresses, promote social media shares, and more…depending on how you set up your form.
One tip is that you can use the “Invent Your Own” option to setup those features.
Just be sure to follow all the rules of Rafflecopter, be very clear about your terms and conditions, including how the winner will be selected and notified, and who will pay for shipping of your giveaway prize.
The best way I have found to include all participants in a giveaway is to have each designer set up his/her own Rafflecopter form to add to their blog. Then, when the giveaway is over, they each submit their one, randomly selected, preliminary winner.
I gather the names of the preliminary winners and add them to the Wheel of Names at https://wheelofnames.com and randomly select the ONE Grand Prize winner.
In this way, all participants can gather email addresses from their signup forms and can use the signup form to link to their affiliate link for bundle sales.
Be sure to notify the winner immediately and ensure they have followed the rules of the giveaway and, then, get their prize to them in a timely manner.
10. Optimize Your Site for Ads
One of the easiest ways to monetize your blog hop is to have your site optimized for passive income with ads. So, get your ad network up and running well before you host your blog hop. Then, sit back and watch the dolla-dolla bills roll in. 😉
If you don’t already have the traffic on your site, in order to get set up with one of the larger ad networks like Mediavine or AdThrive, you can set up Google AdSense (for brand new blogs) or connect with an ad network for smaller blogs like Ezoic or Monumentric.
And, the hope is that, after your blog hop, you’ll have the traffic you need to sign up with the best ad network out there (according to me) Mediavine.
If possible, I highly recommend that you create a video, like the one above, to add to your ad network as a way to increase revenue. I’ve found that hosting videos is an easy way to increase ad revenue on any of my posts.
11. Utilize an Autoresponder
OK, I’m telling you right now that your inbox is going to ramp up during the time of your blog hop.
You’re going to have a bunch of new subscribers who don’t know you and who will take it out on you when they have technical troubles.
You will have readers sending you messages like this, “can’t get pattern” or “doesn’t work” and, even, “Why is it telling me I have to pay when you said it was free? I think you are a scam artist!”
If you’re selling a bundle, you will have non-tech-savvy readers who don’t understand how to unzip a file, particularly on a phone or tablet.
You have a couple of choices…
- take all this personally and beat yourself up,
- lash out at the customer for being…whatever,
- spend hours a day responding to all these messages,
- create your own swipe copy to make responding to these messages a bit less time-consuming, or
- use an autoresponder to respond to as many of these messages as possible.
What I did for my last blog hop was to use swipe copy but, for my next, I’m going to set up an autoresponder using Gmail.
Basically, I’ll create a new Gmail account just for the blog hop. This will keep all this new email out of my regular inbox.
Then, I’ll set up an autoresponder to act as a sort of FAQ to answer questions such as:
I can’t enter the promo code into Ravlery. (Answer: Be sure you’re logged into Ravelry before trying the promo code and, instead of adding the patter to your cart, click “buy it now” and then “enter promo code”.)
Why is it telling me the pattern costs money when you said I could download it for free? (Answer: Rest assured, all of the designs are offered for free on their designated feature day. It may be that you’re trying to access a pattern that is no longer avaible for free. Check the blog hop hub <link to your hub URL> for today’s featured pattern. If the design is today’s featured pattern, be sure you’re logged into Ravelry and simply click “buy it now” and enter the promo code 30DaysofCozy to have the price reduced to $0. If the design is not the featured pattern of the day, you can still get it at a reduced price through our Super Pattern Bundle, which is X% off retail. You can get the bundle here <insert sales page URL>.)
I can’t open this file. (Answer: What device are you using? If you’re on a phone or tablet, you may need to follow special instructions to open a PDF file on that device. Because each device is different, I suggest checking with Google to find out how to do this on your product. If you’re trying to open a .zip file on your device, you’ll need an app like WinZip or UnZip.)
Basically, create a bunch of FAQs like this to go out to anyone who emails your blog hop email address. Then, end it with a notification:
Thanks for connecting! Please note that during times of hosting a blog hop, my inbox can be inundated with more emails than I’m able to personally respond to. The above FAQs should answer most any of the questions you might have about the blog hop. If it does, I will assume your problem is resolved and will not respond individually. If your message, however, requires a response, I will get back to you within 24 hours of receiving your message. Thank you for your patience and understanding!
I’m hoping that this strategy will make it easier for both me and the readers to resolve problems in a timely manner. I’ll let you know how it goes!
12. Allow Your Subscribers to Opt Out
Finally, let’s have you keep as many precious subscribers as you can.
One of the biggest downsides to hosting a blog hop is that you’ll, likely, be emailing your list daily to let them know about the new design being featured.
Well, the email isnt’ the downside. The downside is the potential for mass unsubscribes as some people on your list get tired of seeing you in their inbox each day.
There are a few ways to handle this:
- don’t worry about it and just deal with the unsubscribes,
- create a separate email list for those who opt in to receive daily emails during the time of the blog hop, or
- give people on your list the option to opt out of daily emails while remaining on your list.
For my last blog hop, I used a combination of strategies one and two. At first, I created an opt-in list but, when I realized that the list was substantially lower than the size of my regular list by about 10,000 subscribers, I took the leap and simply emailed my entire list and didn’t worry about unsubscribes…why would you unsubscribe when I’m giving you a bunch of free stuff anyway?! 😉
Next time, though, I will use the third option and create an opt-out list. I’ve done this before, with other promotions, and it worked really well to mitigate unsubscribes.
The easiest way know of to universally create an opt-out option without unsubscribing is:
- Create a new group in your email subscriber platform called Blog Hop Opt Out.
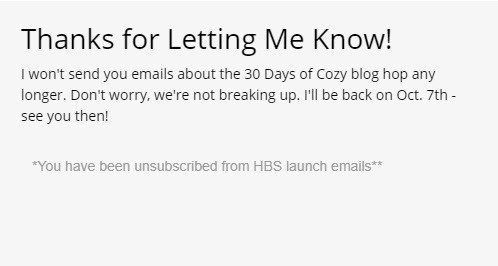
- Create a new signup form that, when used, adds the subscriber to a new group. Edit the success screen to say “You’ve successfully opted out of <insert name of blog hop> emails. I’ll see you on <date of your first email campaign after the blog hop ends>.”
- Grab the URL of the new form and add it to your blog hop email campaigns either as a link from text or from a button. The text can read something like “Don’t want to hear about the blog hop any longer? Click here to opt out.”
- Then, when you send your daily campaigns, be sure to exclude the group called Blog Hop Opt Out.
The only problem with this method is that the user will have to enter their email address in order to be added to the opt out group.
There is a workaround that involves setting up an automation that says “When someone clicks <new form url>, add them to Blog Hop Opt Out group.”
When using that automation, you’d edit your opt out form so that the user couldn’t see the space to add their email addess and simply allow the automation to do that work. See example, below:
This is easier for the subscriber but takes a little bit of tech know-how. If you don’t want to deal with that, just go with the form as it comes and let the subscriber enter their email address.
In the end, taking the time to set up this extra step, automation or not, will save your list and keep your subscribers happy whichever option they choose.
What do you think?
Have you ever hosted a crochet blog hop?
Won’t you comment, below, and share your experiences, your tips, and whether or not you feel the extra work is worth it?
Or, if you haven’t tried hosting a blog hop, I hope you found these tips helpful!
Do you feel a little more prepared to give it a go? Let me know your thoughts!
And, be sure to pin this post to your favorite Crochet Business Pinterest board so you can find it when you need it!


